Homemade Bread Day 2

I love experimenting with recipes! In my last post, I wrote about two recipes for some wonderful homemade bread. These are artisan-type loaves that produce a wonderful, chewy, toast-worthy bread. Especially the cranberry-nut loaf.

My husband loves a softer product for his sandwiches, so I set about researching and testing a few more recipes. I finally found one that is truly easy and makes a beautiful loaf of truly tasty bread. I will put a link down below for the original website. I couldn’t download and print the recipe, so I hand wrote a shortened version for my use. There was a link to print on the site, but it looked sketchy, so I didn’t click on it. However, the author does have a cookbook available that you may want to look at.

What I liked about the bread:

  • Few ingredients
  • Easy to put together
  • Knead or No-knead instructions included
  • Done in a few hours
  • Wonderful taste
  • Dense crumb
  • Easy to slice

I made one or two substitutions. Mainly with the oil. I use half olive oil, and half ghee. I think the ghee enhances the flavor slightly. I used the no-knead, but if you have a stand mixer or you just love to knead dough, this is a good recipe for that. It will be even quicker if you do all the kneading up front.

I suggest that you read through all of the baker’s instructions (she provides photos as well) before trying this bread. Then refer back to her website as needed. But once you get the hang of it, this is a super-easy recipe that comes together quickly. The bulk of the time is spent waiting for the dough to rise. I do the stretch-and-fold every 30 minutes through four repeats. If I’m writing, this gives me ample opportunities to get up and move around every few minutes.

I would like to thank Emma Fontanella for this excellent recipe. I’ve baked this bread four times now, and it is consistently good.

So, without further ado, here is my finished product:

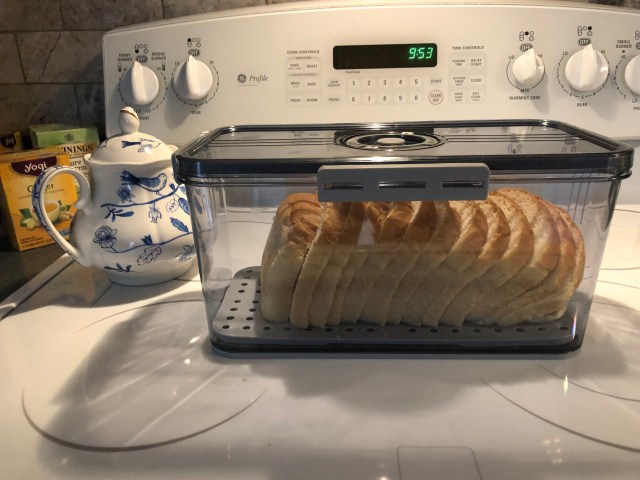
Yes, I bought a breadbox (on Amazon*) to keep my freshly baked bread nice and fresh for several days.

*I don’t make any money off the referrals here

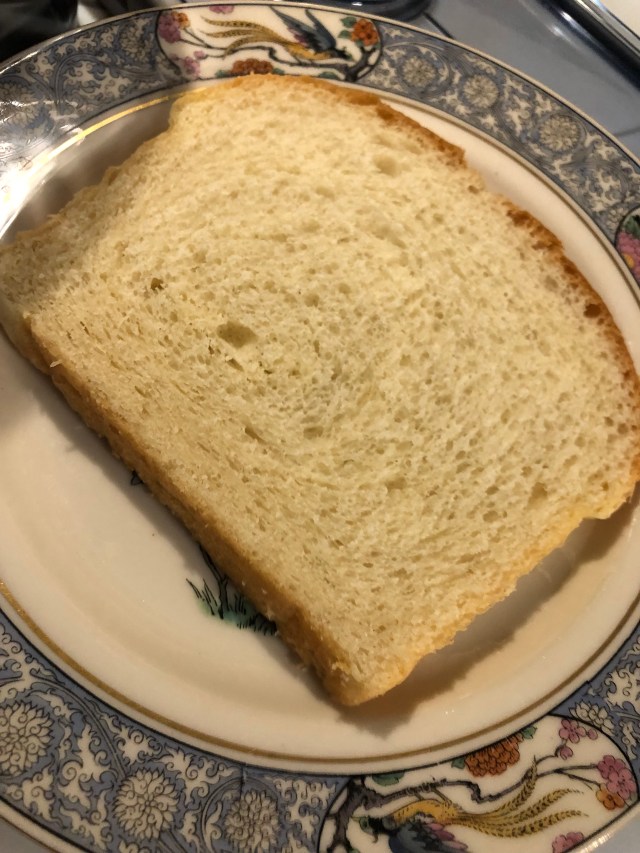
As you can see, the slice is beautiful! It is dense, but soft and the crust is kept soft by applying melted butter immediately following the baking. So, I suppose you could call it “butter crust” bread.

In conclusion: This bread makes wonderful sandwiches. I like to toast it slightly for mine. And it passed the grilled cheese test! It held together very nicely and came out golden brown, just the way I like it. 🙂

Note: I allow the loaf to cool completely – a couple of hours at least – before I slice it with an electric knife. It’s easier to slice that way, and my slices are more consistent.

Happy Baking!

At Home and Homemade

I love the smell of yeast bread baking! I’m inhaling the wonderful aroma right now. Recently, I began testing easy recipes for bread and found two that we love. Both recipes are super simple (no-knead) with only a few ingredients. I use organic bread flour and organic yeast. My husband, Bob, loves the taste of both of these loaves. He commented, “it doesn’t hurt my stomach the way store-bought bread does”. I had noticed that, too.

So, once a week, I bake bread. Both these recipes call for mixing the dough and allowing it to rise for 12-18 hours, either at room temperature, or in the refrigerator. I let it sit in my kitchen. The long rise allows the dough to ferment slightly, which improves the taste.

Right now, I’m baking two recipes, Honey Oat Bread (on left) and Cranberry Nut (on right). The cranberry nut is my favorite. It’s made as a rustic loaf and baked in a Dutch oven or heavy roasting pan. If you’re interested in trying these breads, there are links below to the website. There are other recipes on there, but these two are the only ones I’ve tried so far.

I have not bought bread at the grocery for almost a month now! Of course, I did buy the flour, yeast, etc. All told, I spend about 3 hours of labor on these loaves. That’s not bad, for bread-baking. And I love the process. It gives me such a feeling of accomplishment. A wonderful thing for a writer who struggles to finish her books!

Another wonderful thing–in light of recent climactic events–these breads can be baked outside. You can bake them on your grill as long as you close them up tightly in a covered pan, like a Dutch oven or covered iron skillet. This is how our ancestors got the job done.

What will I turn my hand to next? Maybe I’ll try making my own butter. I’ve heard it’s super easy.

On a different note, we had our first frost for the season last night, so my garden doesn’t look like this now. But, this is how I choose to remember it as I sit here in my warm jacket and enjoy a hot cup of creamy coffee, along with a slice of cranberry-nut bread. Yum!

My prayer for you today:

Our Father, give us this day our daily bread. For spiritual nourishment, as well as physical strength. May God’s love light your way and give you peace.

“Your word is a lamp to my feet and a light to my path.” Psalm 119:105

Until next time!

Links to bread recipes: https://sallysbakingaddiction.com/no-knead-cranberry-nut-bread/

https://sallysbakingaddiction.com/no-knead-homemade-honey-oat-bread/

Annabelle’s Oatmeal Cookies

Drought scarred maple tree and black cat.

Hello, Thursday Morning readers! This morning, I’m looking out at a maple tree that is trying its best to show off, even after forty days straight with no rain. We’ve since had a good bit of rain, but you can still detect the scars of drought on the tree’s leaves.

Can you see the black cat? It belongs to a neighbor, and I suspect it is watching for birds and squirrels at my feeder.

Just in time for Fall, I’m sharing a recipe from Annabelle’s collection. She loves to make these, because her neighbor, Tom Franklin, loves them.

If you’re new here, you may not know who Annabelle is and you may be wondering about it. She’s a sweet, middle-aged lady from the 1950s, who lives in my Kinsman Redeemer series of novels.

What’s so great about this recipe is, you can make the dough and put it in your fridge, then bake them later. You can even freeze the dough. The cookies are thin and chewy, kind of like lace cookies. They are wonderful served with hot tea or coffee. If you’d like a printable recipe, you can download it from my Facebook group page here: Betty Thomason Owens Readers Group.

Annabelle’s Oatmeal Refrigerator Cookies* – an old-fashioned, chewy, oatmeal cookie!

Ingredients:

½ cup lard (I prefer softened butter, but you can also use your favorite vegetable shortening)
½ cup granulated sugar
½ cup brown sugar
1 egg
1-1/2 tsp. grated lemon rind
1-1/2 tbsp. molasses
½ tsp. vanilla
7/8 sifted flour (that’s ¾ cup + 2 tbsp.)
½ tsp. soda
½ tsp. salt
1-1/2 cups rolled oats

Sift dry ingredients (except the oats) into a bowl and set aside. Combine the first seven ingredients (shortening through vanilla) in a large mixing bowl. Mix thoroughly with a large spoon (you can also use a mixer). Add the sifted dry ingredients and stir well.

Add the oats to the mixture. Using hands, mix thoroughly. Note: Annabelle preferred the hand-mixing method. You can continue with a mixer or stir with a spoon.

Additions: Tom Franklin loves these cookies with raisins, so Annabelle mixes in about ½ cup of plumped raisins (she soaks them in hot water for a few minutes to plump them). You can also add chopped walnuts or pecans at this stage.

Mold the dough into a long, smooth roll about 2-1/2” in diameter. Wrap in waxed paper (or plastic wrap). Chill until stiff. This usually takes about three hours, or you can leave it in the fridge overnight.

Heat oven to 400°

Unwrap dough and using a thin, sharp knife, cut in thin slices 1/8” or 1/16” thick. Place slices on a greased baking sheet. Note: I prefer to use parchment paper on my baking sheets. It’s just easier! And I use a serrated electric knife to slice it. It works best if you have left the dough in the fridge overnight.

Bake until lightly browned (about 8 – 10 min.). Annabelle’s note: Watch these closely, you don’t want to burn them.

Makes about 4 dozen cookies

[You can slice these thicker to make larger cookies, but they really spread, so leave lots of room in between]

*This recipe is adapted from one found in the 1950 version of the Betty Crocker cookbook.